Pages

Showing posts with label Image sharpening. Show all posts

Saturday, 10 March 2012

Angles for butterfly photography


Army of bluebottles puddling

Photography of a full grown butterfly can be divided into two categories : Documentary and Artistic. In this post I will be discussing both of them in details with some interesting examples. Many photographers hesitate to move, bend and sometimes laying on the ground. Simply taking the photograph from the angle you first see it, does not makes a great photo. As a thumb-rule, for every purpose of butterfly photography and butterfly activity, there exist a typical angle to shoot. However this rule doesn't apply for artistic photography.

A. Butterfly Documentary Photography:
Purpose of this kind is help for identification, spot record and documentation.


1. Closed wing / Under wing (UN) shot:  In case of some species like lascar, sailor this shot is of utmost importance in identification process. A perfect UN photo is needed to see all the marking on the wing neatly. To accomplish, this one has to wait for butterfly to close its wings and settlement. During nectoring, butterfly seats on the flower. If the flower is not high enough, one needs to to bend. Otherwise one has to adjust the height accordingly.

After this, photographer should get in a place where camera is exactly perpendicular to the wings of the butterfly. Such angle covers the whole wing. It also helps to have lower aperture number, as depth of field required would be very shallow. Lower f-number will help to choose higher shutter speeds (improves sharpness of the photograph) and lower depth of field will impart nice bokeh to the image. Both features will enhance the beauty of the photo and additionally will make a perfect picture for documentation. This position of camera/photographer is much important when shooting mud-puddling butterflies.

One has to lay down flat on the ground to shoot in this angle. Often, photographers keeps standing and shoot mud puddling butterfly. This gives a slant and partial view of the same. If one cant lay down on ground, camera with veri-angle screen e.g. Canon 30X, Canon 60D etc is useful. Veri-anlge LCD will help to keep camera on ground and then tilting the LCD to view, focus and compose the image. Another case for a closed wing would be when  butterfly is resting on some small object with wings complete open. This can also provide under wing shot, small object hiding some part of the body.
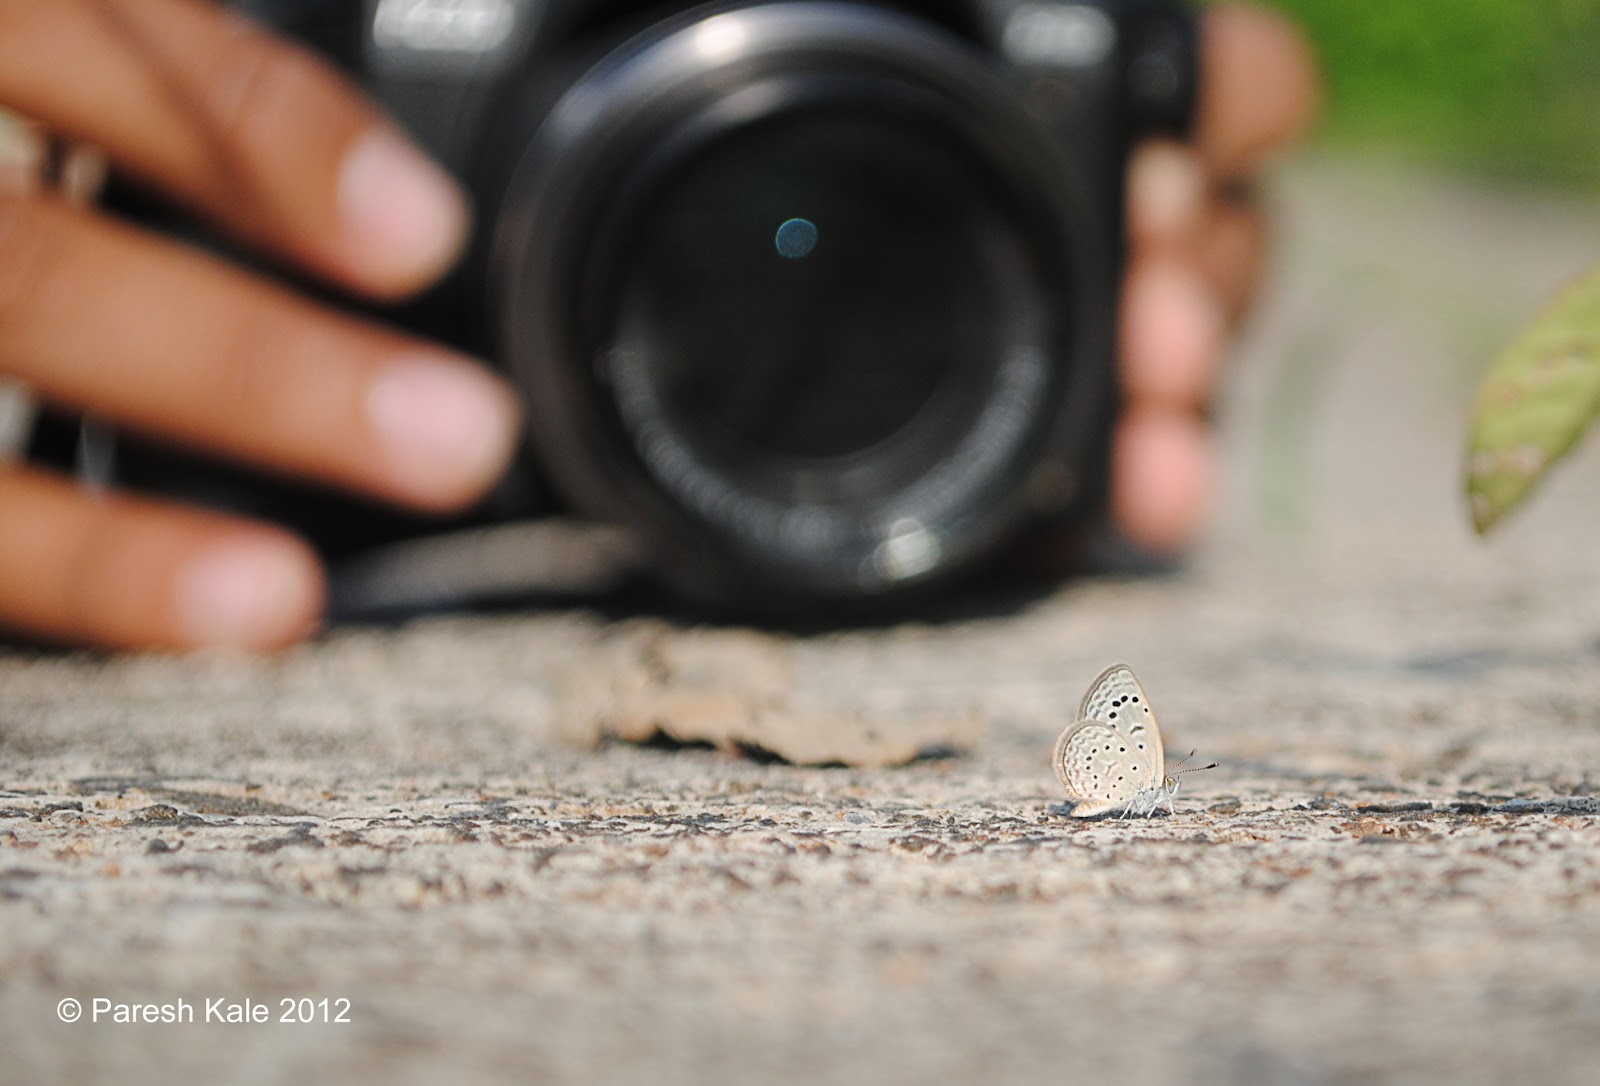

Use of veri-angle or tilting LCD for mud-puddling butterfly


2. Open wing / upper wing (UP) shot: Apart from help in ID, Open wing shot often helps in differentiating male and female. There can be two occasions to get complete open wing shot of a butterfly: While basking or while mud-puddling. In the morning, butterfly often seats on a large leaf with wings flat open. This is in order to dry there wet wings because of dew. Most butterflies seats at suitable height for photographing, specially the small ones like plains cupid, line blues, lime blue etc. Some like Tawney rajah seats on a big leaf at some height, not reachable, making ti difficult to photograph. Again for a perfect open wing shot one should bring lens axis perpendicular to the plane of the wings spread. Advantages are same as stated in closed wing shot.

Perfect angle of tiny butterflies is sometimes intriguing


3. Miscellaneous shots: On very rare occasions, shot of the antenna is required. The angle to shoot whole of the antenna would be perpendicular to the plane of the antenna. This is critical shot, as one must shoot it at 1:1 macro. 

B. Butterfly Artistic Photography: 
Shot this beauty from the front while mud-puddling
        Although, every perfect and sharp shot taken with documentary kind of angle will be artistically appreciable I wish to mention some angles in this category. My personal favorite is the front angle. Eyes of butterfly is a striking feature when shot closely. A complex-eye structure is fabulous when seen in close-up. When shot from front side of the butterfly, during nectoring or mud-puddling, both eyes are captured. Mud-puddling is the best opportunity to have such shot. Added advantage in this case is the proboscis inserted in the ground. Another angle would be from behind of the butterfly. Almost every butterfly has dummy eyes like markings on its hind-wings. This is to create an illusion and in order to protect butterflies from predators like bird. These eyes and sometimes tails can be interesting to watch.


Eiffel tower like pose of apefly

Example of wallpaper angle
Another interesting  but difficult-to-achieve angle is : wallpaper angle. When butterfly opens its wings partially during nectoring or mud-puddling, one can photograph the pose at 45 degree angle. This covers almost every part of butterfly, although partially. It creates nice blur effect to out of depth of field parts.

A high angle would be interesting when shooting a butterfly with open wings and sitting at some height above photographers head. Eye can be focused perfectly, while making the rest of body blur by choosing lowest possible aperture. Photographing sailors with this angle would be a good net practice . Sailor like butterflies often seats in such position. 


High angle of common sailor

High angle of common sailor, another one

Monday, 5 March 2012

Butterfly Egg


Top and side view of a Common baron egg laid on Cashew leaf

Zebra blue laying egg on Plumbago.
     Life cycle of a butterfly starts with an egg. Probably most wonderful activity by a tiny creature apart from nectoring. Chain of actions before egg laying adds excitation and sometimes surprise to the nature lover.It all starts with hunt for the right larval host plant. Female hovers over a region to find the appropriate one. Now one has to be ready with the camera and track the lady. Female settles, sits on the prospective surface with curved abdomen, it is the start for the egg laying activity. For cameraman to shoot egg laying activity, getting into right position sometimes a not-easy-to-do job. Furthermore the activity lasts for few seconds in many cases when a single egg is laid. However if multiple eggs are laid then its relatively simple to take best photos. Watching egg laying female is best start to  successful life cycle documentation.


Fresh Egg of common crow, sticky liquid is seen at the base
         Eggs are too tiny, sometimes even for 1:1 macro lens, to take good photos. Best setup would be - a tripod mounted camera with true macro lens and creative lighting system. Sharp and close-up image reveals the features of the egg properly. The ornamentation with ridges, pits, polygonal cells can be seen in best of the image. A thin layer of sticky substance can also be seen. This layer keeps the eggs attached to the surface where it is laid, surface may be a leaf or bud or flower. Normally it takes about 2-4 days to hatch an egg and hatching time depends on the species.


       Few observations of egg/s, may lead to conclude about the butterfly species and to determine whether the egg was laid by butterfly or some other insect. Here are some points which can be considered while observing eggs:

Top view of dome shaped egg of Giant Red Eye
1. The larval host plant: Every butterfly prefers one out of bunch of preferred plants to lay eggs. This information and verification in the checklist reduces the list of possible candidates to few.  For example, If a butterfly egg is found on coconut tree, most likely it would be of common palmfly. Some species need association of ant for caterpillar growth. In such cases, female prefers the plant only if ants are present. On very few occasions, egg is laid in the vicinity of the larval host plant. In this case, caterpillar searches for right plant and starts feeding. A rare case is female making a mistake in identifying the larval host plane. Such "oviposition" mistakes are uncommon but have been  reported. Me and Abhay were involved in one such case by common wanderer female. She laid eggs on Ziziphus, which is not a LHP of the species involved. We searched for its usual LHP, Capparis, in the vicinity. We found none. 

2. The shape of an egg: It differs from family to family. 
     a) White and yellows: Eggs like bottle shaped or grain of rice.
     b) Swallowtails : Round shape like ball.
     c) Blues: Semi-spherical or dome shaped with spines
     d) Skippers: dome shaped without any markings
     e) Brush-footed butterflies: Half-open flower 

3. Number of eggs: Number of eggs laid in a batch depends on the butterfly species. Some lay single egg while some lays many eggs in batches. Number of eggs in batch may vary from a small batch of 2-3 eggs to a big hundred. Egg laying in small batches for few days may happen in case of some species. Common wanderer is observed to lay around 7 eggs in two batches. Small salmon Arab, Tawney Castor may lay around hundred eggs.

4. Location on surface where egg is laid: Leaf of larval host plant is most preferred place to do so. Sometimes its laid under the leaf, over the leaf, on offshoot. Some species choose flowers to lay egg on. 


Different types of butterfly eggs
Pulpit rock
Spherical egg of Common Nawab
Pulpit rock
Seven eggs of Common Wanderer, laid in two batches
Pulpit rock
Egg of Common Sailor on tip of leaf
Pulpit rock
Most likely egg of Dark evening brown
Forget-me-not (Catochrysops strabo) egg laying on sprouts of Paracalyx scariosus  (Marathi: रान घेवडा )

Dark grass blue laying egg on flower


References: 

1. Butterflies of peninsular India by Dr. Krushnmegh Kunte, 1st Editiion, 2000, University Press Pvt. Ltd.


Sunday, 26 February 2012

Image sharpening using High pass filter


With Photoshop, a photo can be sharpened in many ways. Some popular among them are : sharpen, smart sharpen and most popular unsharp mask. Here, I wish to demonstrate image sharpening technique I use : using a high pass filter. Its a few step process and creating action for this one is also fairly simple. Once created action, sharpening can be applied with just a click to any image in future. However, I wont be explaining here how to create actions, some other time.  :-) OK, so lets begin.

Step 1. Open the image. (layer name: background, by default)

Step 2. Duplicate the image. (layer name: Layer1, by default)

Step 3. Change the blend mode of Layer 1 to "Overlay". Blend modes can be found just above the layer panel.

Step 4. Now apply High pass filter to Layer1. Its can be found under the menu : Filter - Other -High pass.

Step 5. Set the radius value around 5. The key for correct sharpening is that one should see the edges in the thumbnail. press OK.

Step 6. Now, adjust the intensity of sharpening just by adjusting the Layer1 opacity.

Step 7. Cheers !

The images here are for demo. Changes may be  subtle to observe with images provided. Better, open them in separate window and compare them to see the effect. Ideally, advised to carry the high pass sharpening to ur own image with good resolution and observe the effect.

Before Sharpening, Butterfly species : Pea Blue

After sharpening

Few reminders:

1. Better original image provides better flexibility.
2. High pass filter improves contrast a bit.
3. This technique is well suited for photos with blurred background. As such background do not have edges, high pass filter is not applied to that part at all.